
| 일 | 월 | 화 | 수 | 목 | 금 | 토 |
|---|---|---|---|---|---|---|
| 1 | 2 | 3 | 4 | 5 | ||
| 6 | 7 | 8 | 9 | 10 | 11 | 12 |
| 13 | 14 | 15 | 16 | 17 | 18 | 19 |
| 20 | 21 | 22 | 23 | 24 | 25 | 26 |
| 27 | 28 | 29 | 30 |
- useMemo #React.memo #최적화 #re-rendering
- useCallback #최적화 #함수형 업데이트
- useReducer
- Common JS 모듈 시스템
- React #API 호출 #async #await #fetch
- React #Context #props drilling #useMemo
- Kotlin
- 패키지
- React #React 사용하는 이유
- Node.js #
- Today
- Total
세현's 개발로그
코틀린-퀴즈 앱 본문
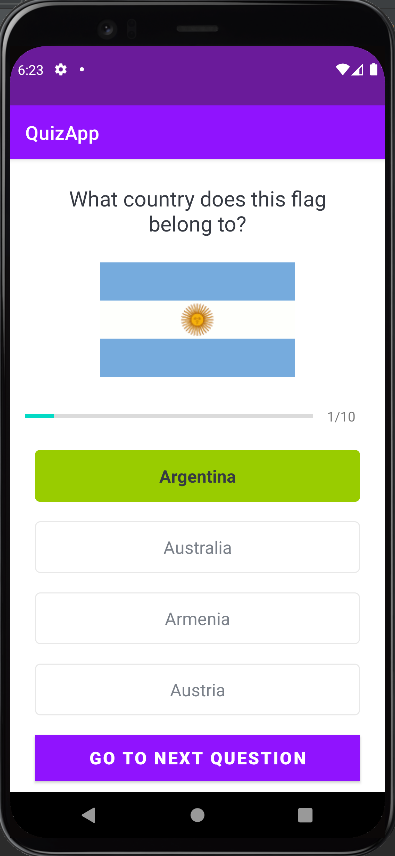
#1 버튼 기능을 질문 활동에 추가하기
◎ 버튼을 눌렀을 때 보라색 테두리가 만들어지도록 하는 것이 목표
버튼을 눌렀을 때의 스타일을 만들어야 하므로 우선 새로운 파일부터 만든다.
<?xml version="1.0" encoding="utf-8"?>
<shape xmlns:android="http://schemas.android.com/apk/res/android"
    android:shape="rectangle">

    <stroke
        android:width="1dp"
        android:color="@color/colorPrimary" />

    <solid android:color="@android:color/white" />

    <corners android:radius="5dp" />
</shape>
어떤 옵션을 선택했는지 확인할 mSelectedOptionPosition 변수를 만들어 디폴트 값으로 선택한 옵션을 0으로 설정한다.
-> 그러면 버튼을 눌렀을 때 재정의 가능
private var mSelectedOptionPosition: Int = 0뷰를 누르면 나머지는 디폴트 값인 회색 테두리로 되도록 만들어 준다.
for (option in options) {
            option.setTextColor(Color.parseColor("#7A8089"))
            option.typeface = Typeface.DEFAULT
            option.background = ContextCompat.getDrawable(
                this@QuizQuestionsActivity,
                R.drawable.default_option_border_bg
            )
        }
option.typeface=Typeface.DEFAULT가 중요한 이유는 어떤 옵션을 선택했을 때
테두리를 보라색으로 되게 하고, 글자를 볼드체가 되도록 할 건데, 디폴트 값을 해주지 않으면
모든 글자가 볼드체가 되어버린다.
this 키워드로 onClick 리스너를 이용하면 이전에 직접 모든 리스너를 하나하나 작성했하여 코드가 지나치게
길어지는 것을 방지할 수 있다.
        tvOptionOne?.setOnClickListener(this)
        tvOptionTwo?.setOnClickListener(this)
        tvOptionThree?.setOnClickListener(this)
        tvOptionFour?.setOnClickListener(this)
        buttonSubmit?.setOnClickListener (this)
#2 참 거짓 답변을 고르고 다음 질문에 반영하기
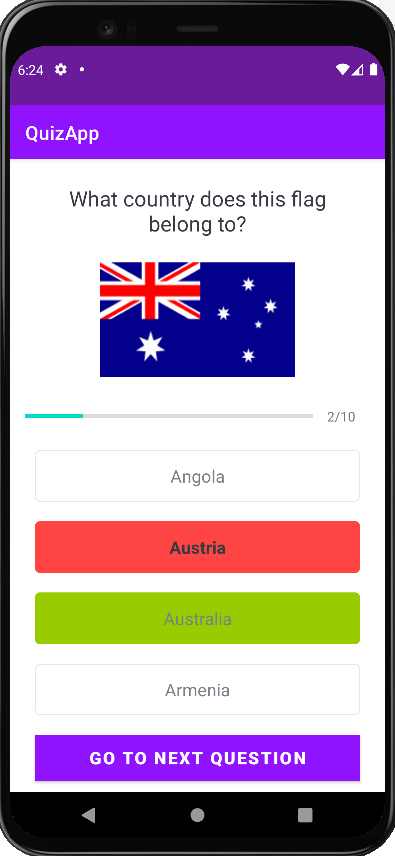
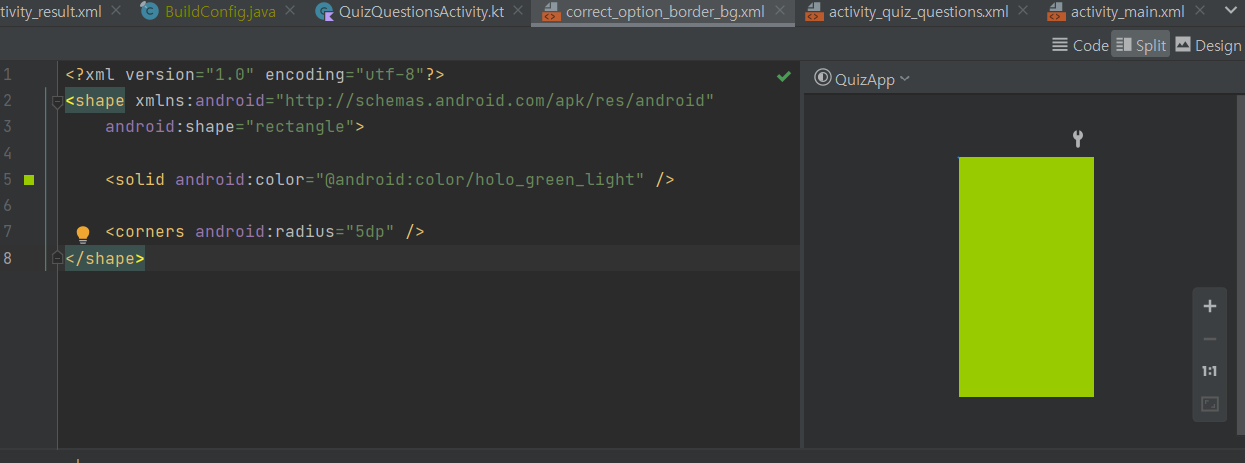
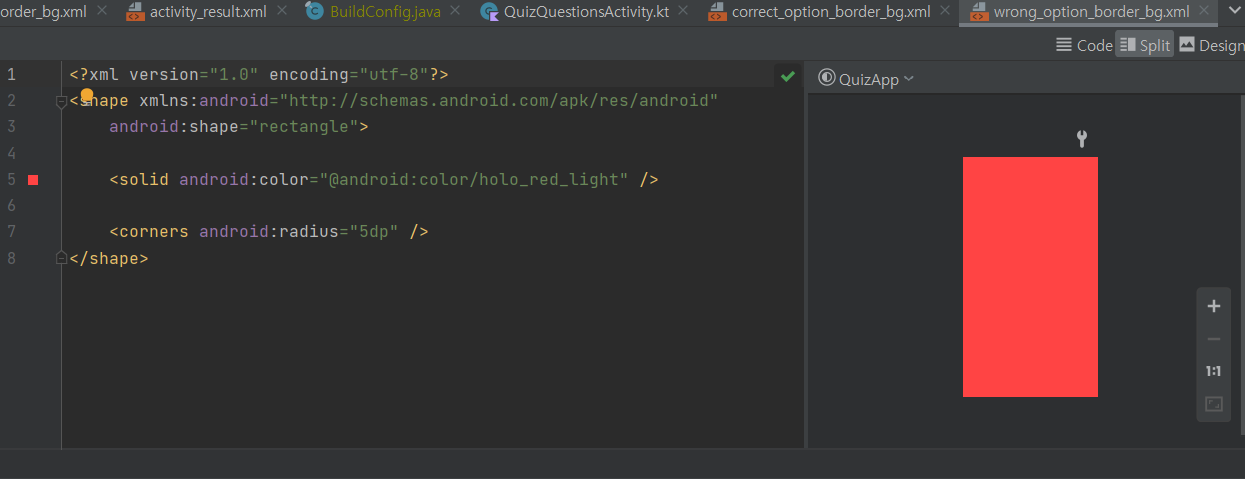
답을 선택했을 때 맞았을 때와 틀렸을 때의 텍스트뷰 배경 색을 각각 초록색, 빨강색이 되도록 각각 스타일 파일을 만들어준다.
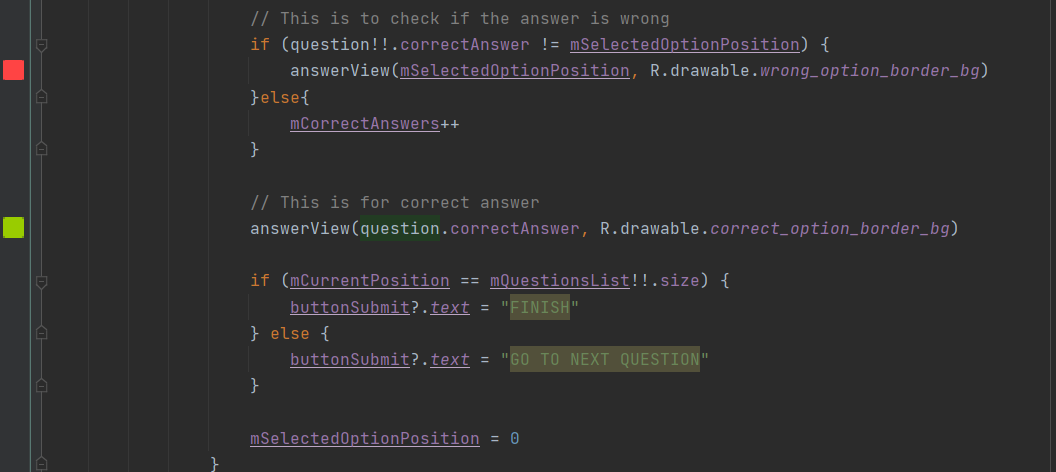
'answerView(question.correctAnswer,R.drawable.correct_option_border_bg' 이 코드가 정답의 배경색을 바꿔준다.
if문으로 mCurrentPosition이 질문의 양과 같다면 버튼을 설정하도록 만든다.
마지막에 가장 중요한 건 mSelectedOptionPosition=0으로 설정해 선택한 옵션 위치를 0으로 돌아가도록 한다.
그렇지 않으면 지금 선택한 옵션이 그대로 남아서 오류가 나고 앱이 원하는 대로 작동하지 않는다.
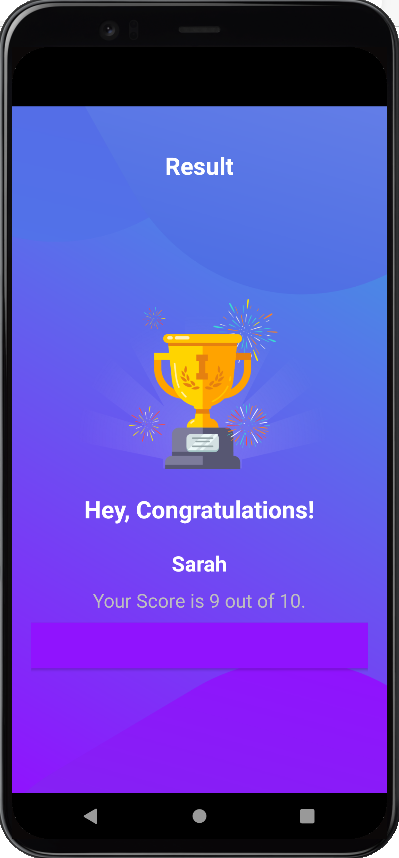
#3 결과 활동을 위해 UI 준비하기
<LinearLayout
    xmlns:android="http://schemas.android.com/apk/res/android"
    xmlns:tools="http://schemas.android.com/tools"
    android:layout_width="match_parent"
    android:layout_height="match_parent"
    android:background="@drawable/ic_bg"
    android:orientation="vertical"
    android:gravity="center_horizontal"
    android:padding="20dp"
    tools:context=".ResultActivity">

    <TextView
        android:id="@+id/tv_result"
        android:layout_width="wrap_content"
        android:layout_height="wrap_content"
        android:layout_marginTop="25dp"
        android:text="Result"
        android:textColor="@android:color/white"
        android:textSize="25sp"
        android:textStyle="bold" />

    <ImageView
        android:id="@+id/iv_trophy"
        android:layout_width="wrap_content"
        android:layout_height="wrap_content"
        android:contentDescription="image"
        android:src="@drawable/ic_trophy" />

    <TextView
        android:id="@+id/tv_congratulations"
        android:layout_width="wrap_content"
        android:layout_height="wrap_content"
        android:layout_marginTop="16dp"
        android:text="Hey, Congratulations!"
        android:textColor="@android:color/white"
        android:textSize="25sp"
        android:textStyle="bold"/>

    <TextView
        android:id="@+id/tv_name"
        android:layout_width="wrap_content"
        android:layout_height="wrap_content"
        android:layout_marginTop="25dp"
        android:textColor="@android:color/white"
        android:textSize="22sp"
        android:textStyle="bold"
        tools:text="Username" />

    <TextView
        android:id="@+id/tv_score"
        android:layout_width="wrap_content"
        android:layout_height="wrap_content"
        android:layout_marginTop="10dp"
        android:textColor="@android:color/secondary_text_dark"
        android:textSize="20sp"
        tools:text="Your Score is 9 out of 10" />

    <Button
        android:id="@+id/btn_finish"
        android:layout_width="match_parent"
        android:layout_height="wrap_content"
        android:layout_marginTop="10dp"
        android:background="@android:color/white"
        android:text="FINISH"
        android:textColor="@color/colorPrimary"
        android:textSize="18sp"
        android:textStyle="bold" />
</LinearLayout>
#4 마지막 마무리 후 데이터를 Intent.putExtra에 보내기
constant 파일로 가서 필요한 변수를 만들고 정보 값을 다른 액티비티로 보낼 때 항상 constant 하위에
원하는 세부 사항을 입력해 두는 게 좋다.
이 부분이 변수가 가지고 있는 정보값을 표현한 키워드라 생각하면 된다.
    // TODO  Create a constant variables which we required in the result screen
    const val USER_NAME: String = "user_name"
    const val TOTAL_QUESTIONS: String = "total_questions"
    const val CORRECT_ANSWERS: String = "correct_answers"
MainActivity로 정보값을 보내야 한다.
val intent = Intent(this@MainActivity, QuizQuestionsActivity::class.java)
              // TODO Pass the name through intent using the constant variable which we have created.
액티비티를 시작시키는 동시에 추가로 정보값을 보내기 위해 intent를 사용한다. intent로
추가적인 정보값을 한 액티비티에서 다른 액티비티로 옮기고 난 뒤에 다른 액티비티에서 정보값을 회수할 수 있다.
마지막으로 result 액티비티에서 모든 정보값을 회수해서 표시해야한다.
class ResultActivity : AppCompatActivity() {
    override fun onCreate(savedInstanceState: Bundle?) {
        super.onCreate(savedInstanceState)
        setContentView(R.layout.activity_result)

       //Todo: connect to each view in the layout through its id
        val tvName: TextView = findViewById(R.id.tv_name)
        val tvScore:TextView = findViewById(R.id.tv_score)
        val btnFinish:Button = findViewById(R.id.btn_finish)

        val userName = intent.getStringExtra(Constants.USER_NAME)
        tvName.text = userName

        val totalQuestions = intent.getIntExtra(Constants.TOTAL_QUESTIONS, 0)
        val correctAnswers = intent.getIntExtra(Constants.CORRECT_ANSWERS, 0)

        tvScore.text = "Your Score is $correctAnswers out of $totalQuestions."

        btnFinish.setOnClickListener {
            //
            startActivity(Intent(this@ResultActivity, MainActivity::class.java))
        }
}'Kotlin' 카테고리의 다른 글
| XML 사용법과 UI 생성법 배우기 (0) | 2022.10.31 |
|---|---|
| Kotlin 개발 완전 정복(2) (0) | 2022.10.06 |
| Kotlin 개발 완전 정복(1) (0) | 2022.09.27 |

